This is a sponsored conversation written by me on behalf of Cricut. The opinions and text are all mine.
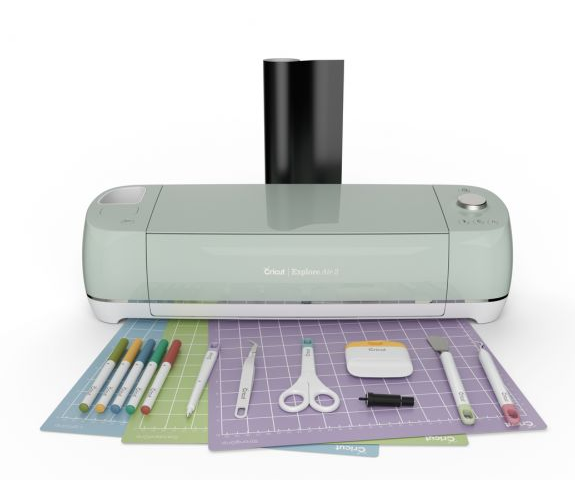
I am beyond excited to share with you some amazing creations for my classroom as part of my new partnership with Cricut! Cricut so generously gifted me a Cricut Explore Air™ 2 machine as well as an EasyPress 2 to design and create with. Let me tell you, the possibilities for creating with these machines is endless! With so many amazing tutorials provided on the Cricut website I was able to easily pick up the ins and outs of using both machines. I can’t wait to share some fabulous ideas for using Cricut products in your classrooms! My first project was creating magnetic name tags for students so that changing the class jobs chart weekly is a breeze!
Class jobs are a great way for students to have a sense of community and responsibility within the classroom. To read my full blog post about class jobs click HERE. While I absolutely loved having my class jobs, I often wished there was an easier way to assign them weekly. In past years I had written students’ names to assign jobs, and week after week had to re-write them which wasn’t ideal. In lieu of writing students’ names, I switched to using magnetic pebbles with numbers representing each student. I ultimately had two issues with the pebbles, the first being the numbers would constantly get lost, and second I didn’t like referring to the students as numbers rather than using their names. After receiving my Cricut Explore Air 2 and realizing its capabilities, I knew right away I wanted to use the Cricut Design Space to create magnetic name tags for my students. Using the Cricut Explore Air 2 I was able to cut the name tags out with minimal and LOTS of cuteness!
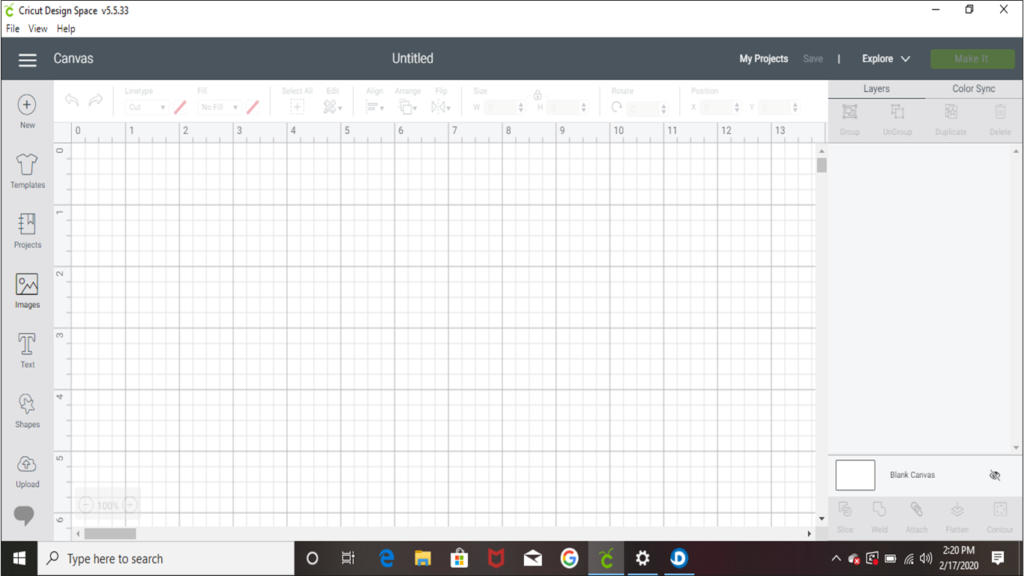
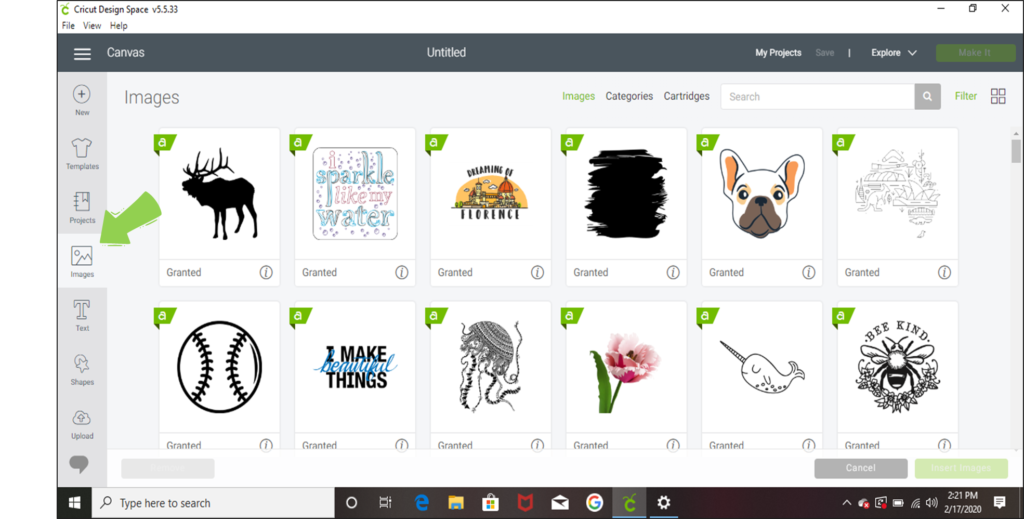
The Cricut Design Space will be empty when you first open it. To begin, insert an image. This image will be the background behind the text on each magnet. Use the picture below to reference where the image icon is located.
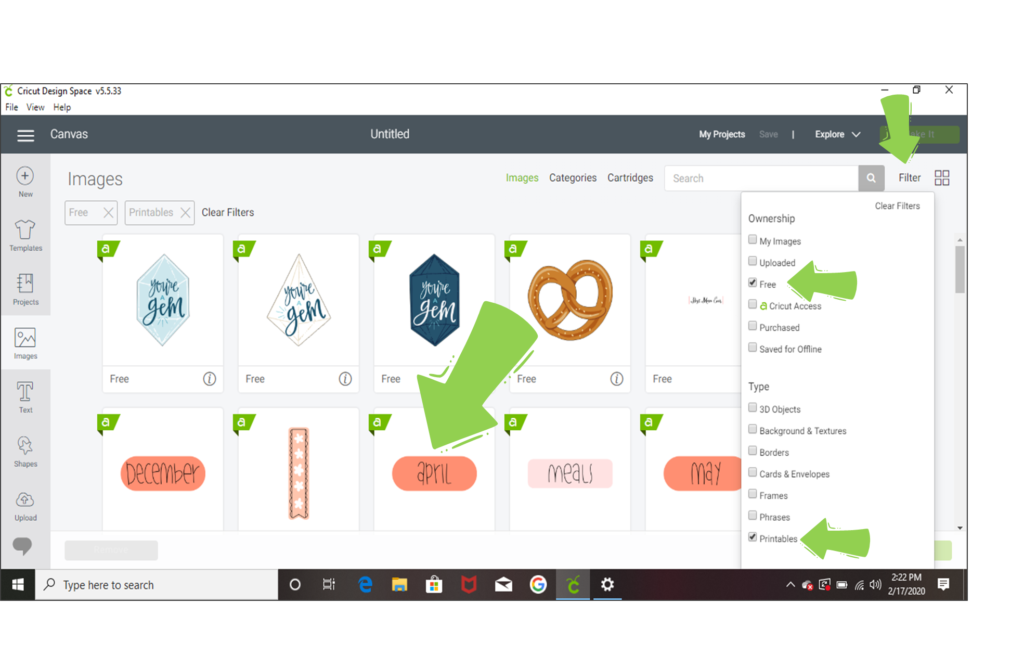
Once you click insert image you will see a large gallery of images to select from. Because there are so many designs within the Design Space, it’s easiest to search for images with filters on. This will allow you to select from fewer choices. For this project set your filters to FREE and PRINTABLES (as shown below). I decided to go with the peach April design but you can select any printable you’d like. You are able to change the colors of the printables throughout this project.
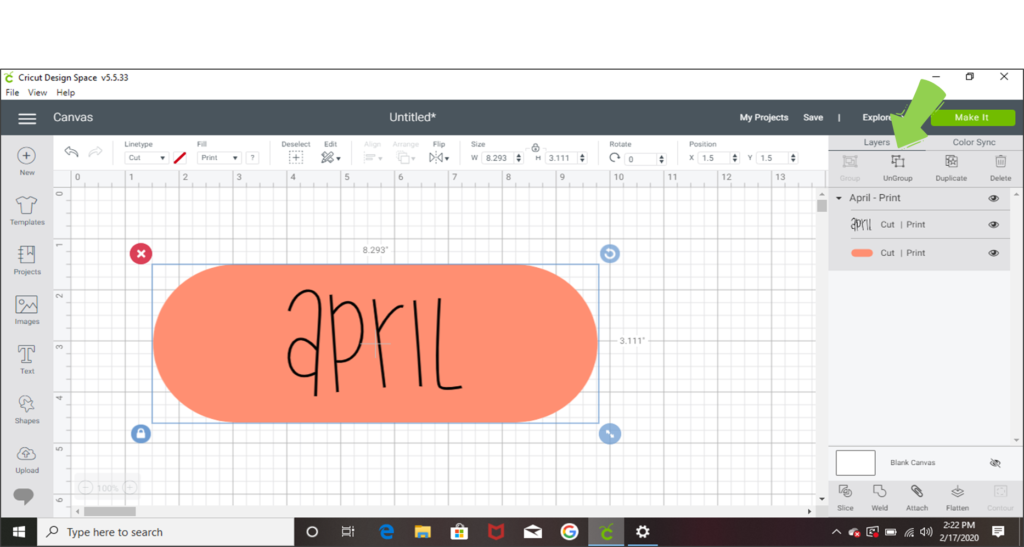
When the April printable gets inserted into your Cricut Design Space it will be grouped together (both text and shape). The first thing you will want to do is ungroup the text and shape. This will allow you to change the text from saying April to your students’ names instead. To do this, select the peach April image, then select ungroup as shown below. If you have a hard time ungrouping the image, check to see if your image is locked (blue lock on bottom of the image). If it is locked, click the same blue lock in order to unlock it. Once you have ungrouped the image you can simply remove the April text right off of the peach oval.
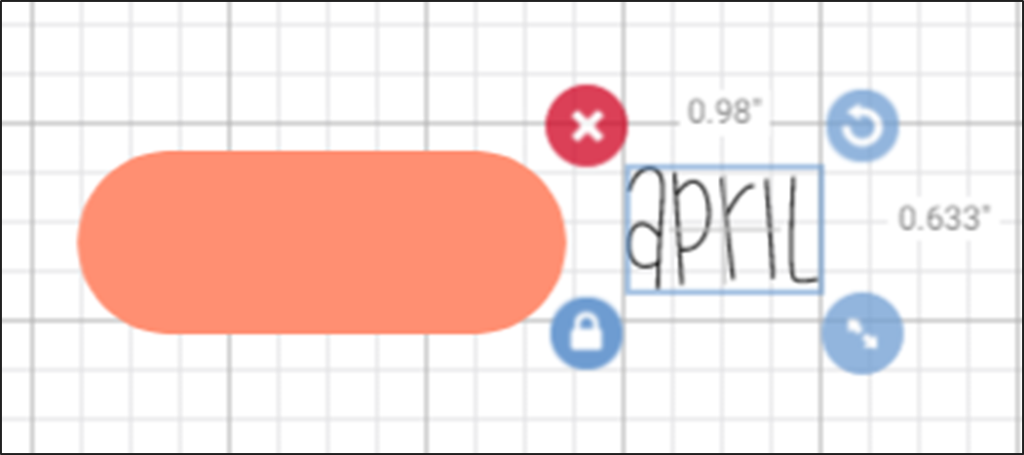
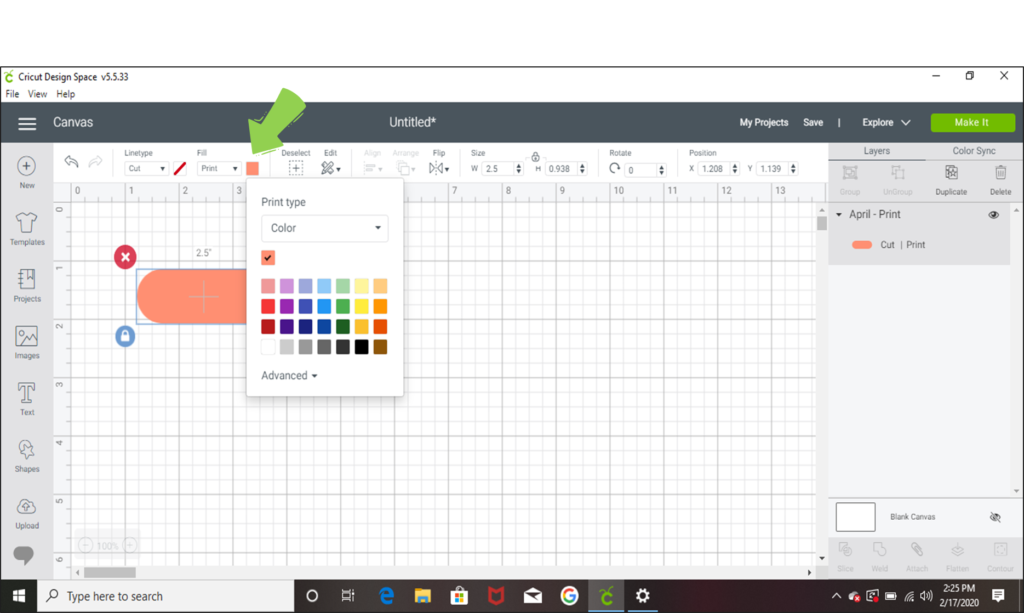
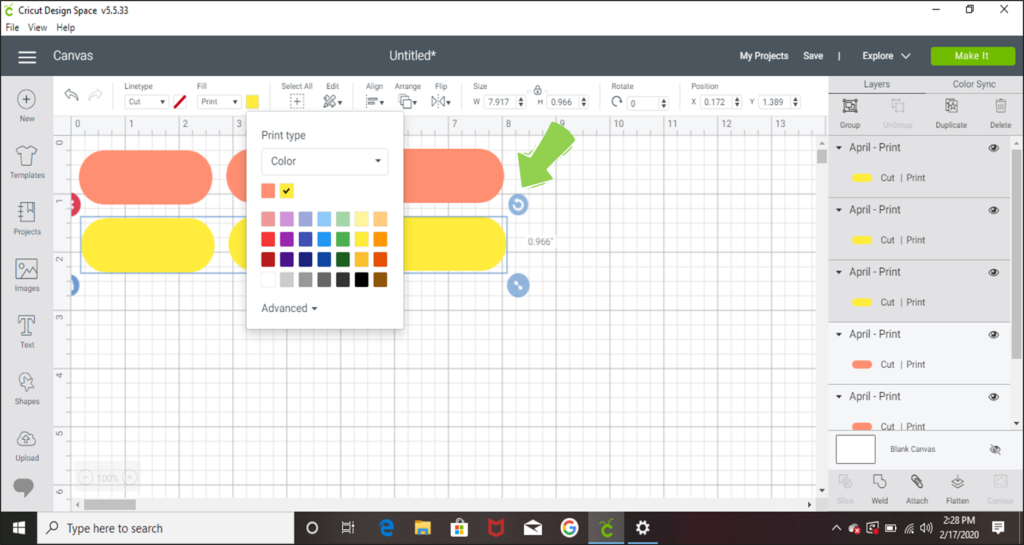
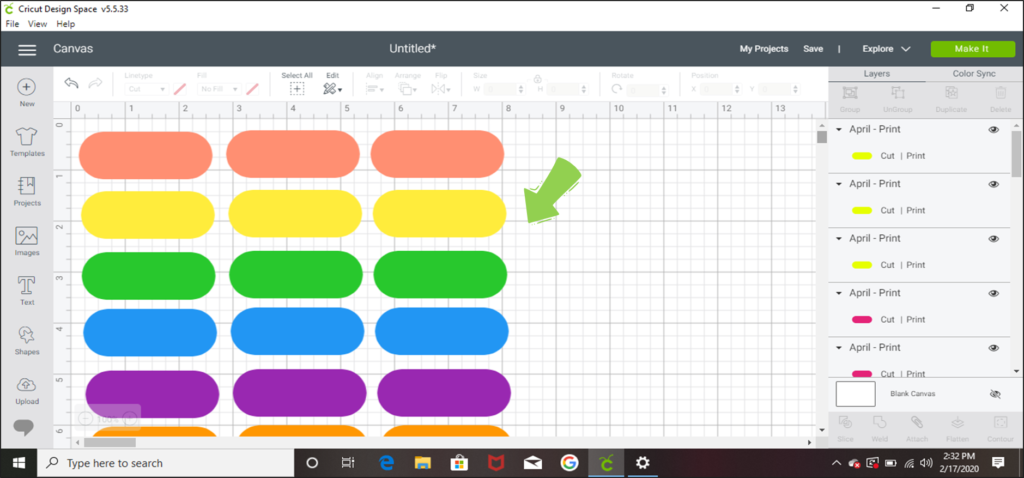
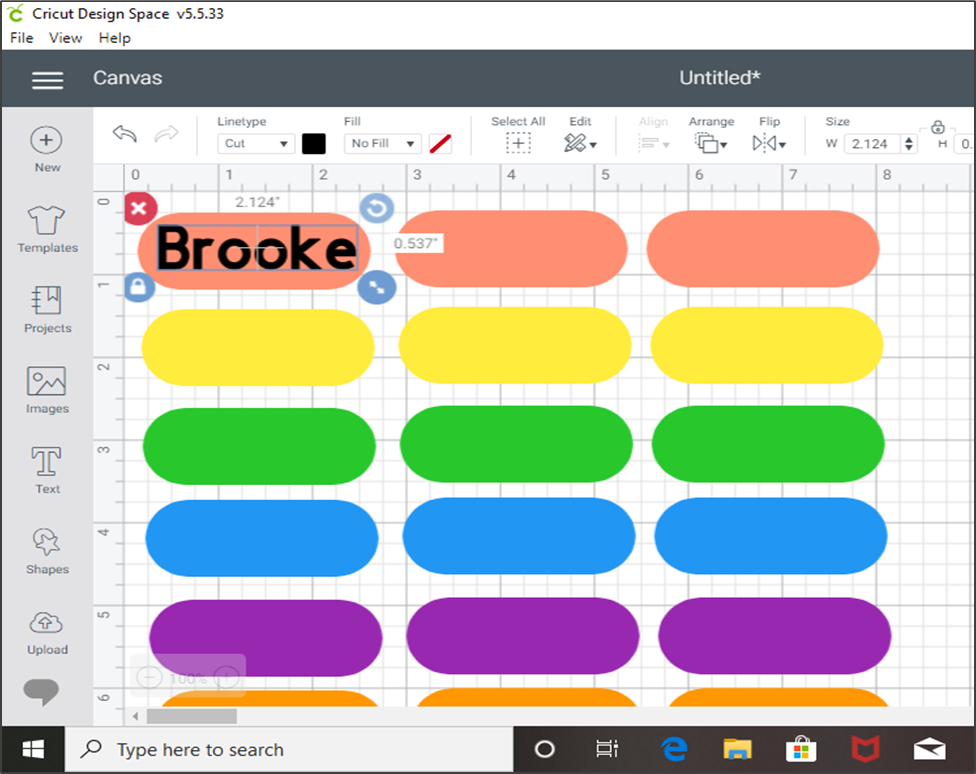
Next, decide on what color you want your magnets to be. I wanted to have a vibrant class jobs chart so I decided to go with a few different color options for students. You can also ask students at the beginning of the year which color they would like! Here is an example of how to change the image color. Once I changed the image color I simply used Ctrl+C to copy my image and Ctrl+P to paste it several times. You will want enough ovals for each student in your class.
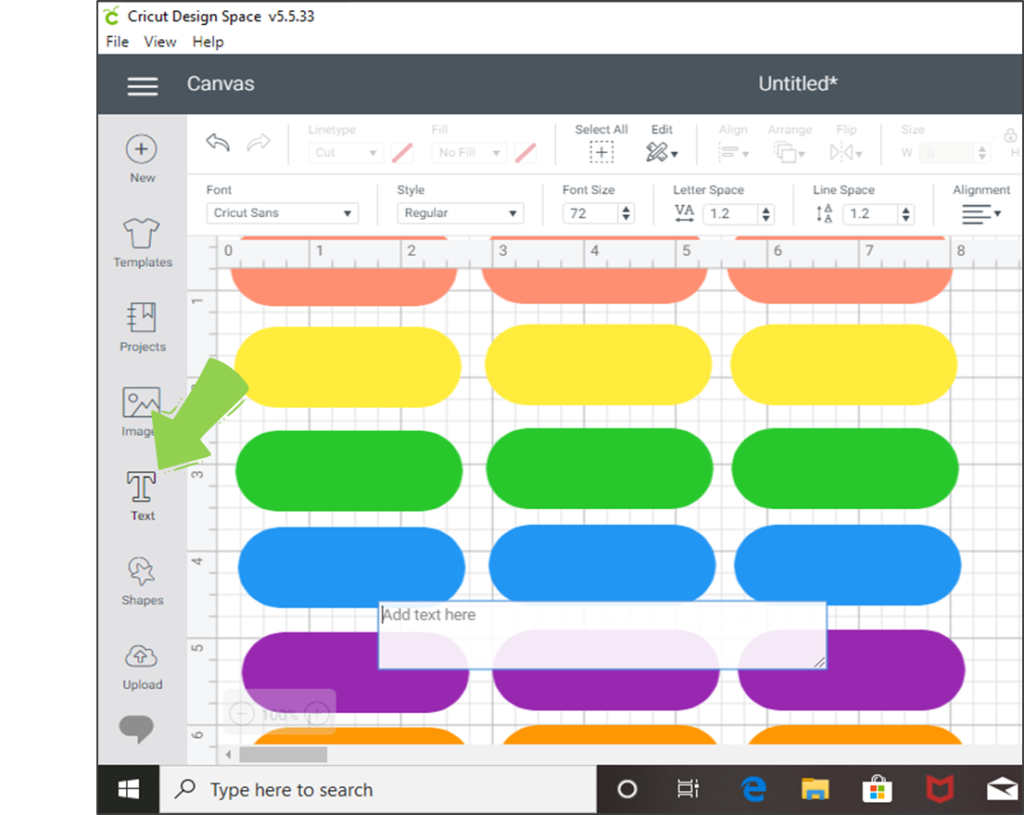
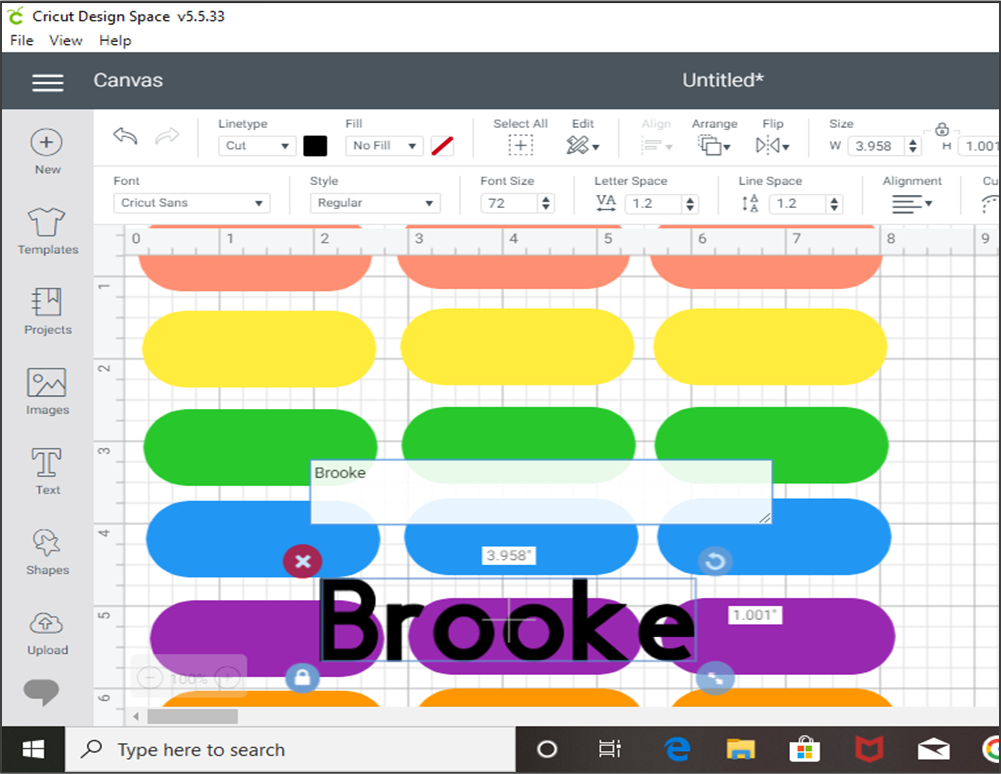
The next step is adding text for the names of your students. This can be done by clicking on the TEXT icon which is located on the left side of the toolbar. Once you click the text icon, a box will pop up allowing you to type a student’s name. Once you type the name of a student, drag the student’s name and place it over the first oval in the top row.
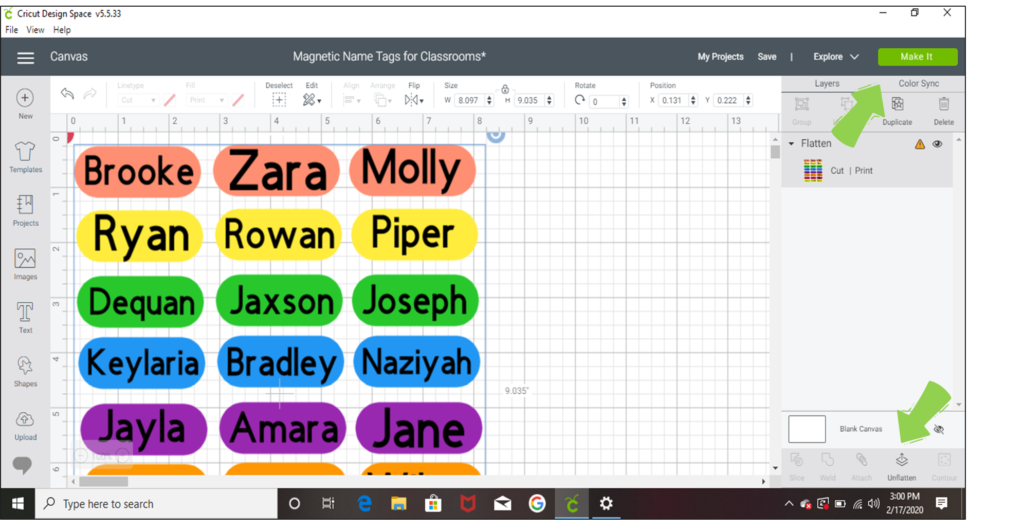
You will want to follow the process of using Ctrl+C and Ctrl+P to copy and paste the names within the Design Space. This will create name tags that are all the same font/style. Depending on the size of your students’ names, you may need to click and drag the bottom right corner of the text box to fit the names within the template. Once all names are where you’d like them to be, use Ctrl+A to select ALL (the text and images), then click FLATTEN. After clicking the flatten icon, you will notice the word flatten turns to unflatten. The last big step within the Design Space is to click MAKE IT!
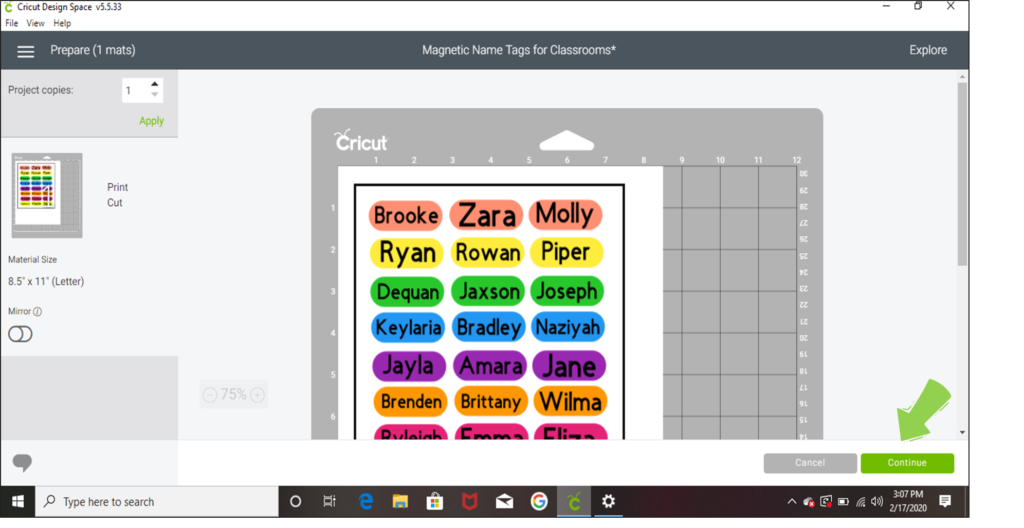
Once you select MAKE IT, a new box will pop up showing your design. As long as everything looks they way you’d like it to, go ahead and click CONTINUE.
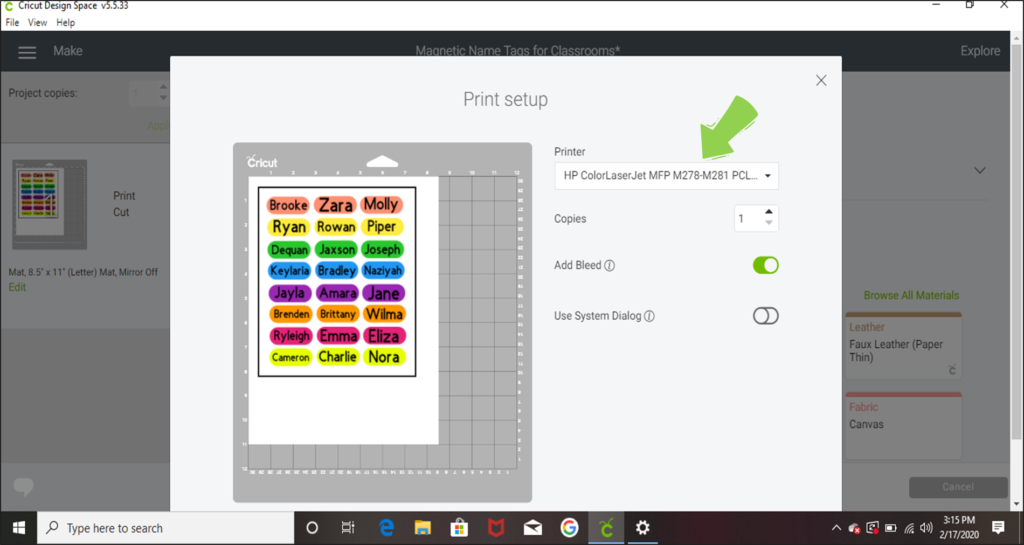
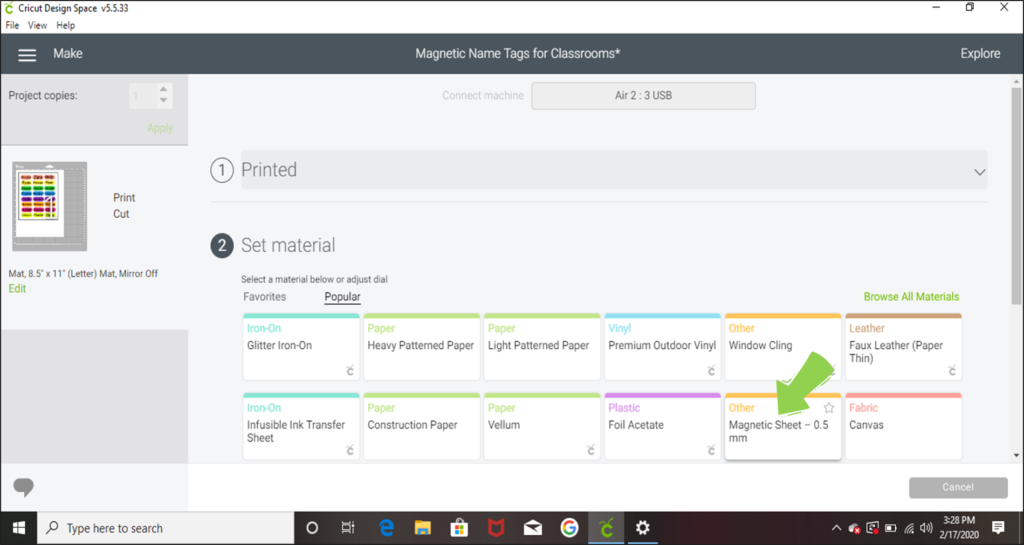
Next Cricut will automatically begin searching for your machine in order to connect it. Once your machine is detected you’re ready to print! Make sure to check that the correct printer is selected. You will also need to select MAGNETIC SHEET from the material types.
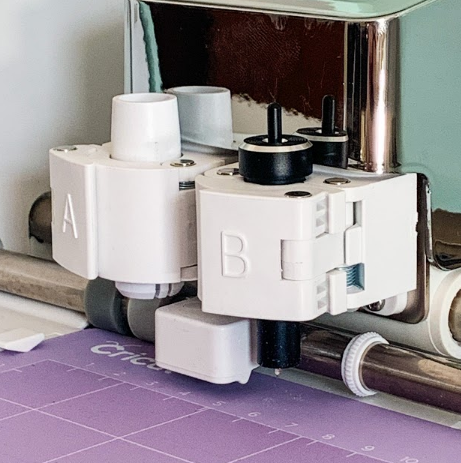
After you print the name tags on magnetic paper, you will need to insert the Cricut Deep-Point Blade + Housing because of how thick the magnetic paper is. This blade makes it easy to cut a wider variety of materials for projects such as magnets! The Deep-Point Blade + Housing can be purchased HERE!
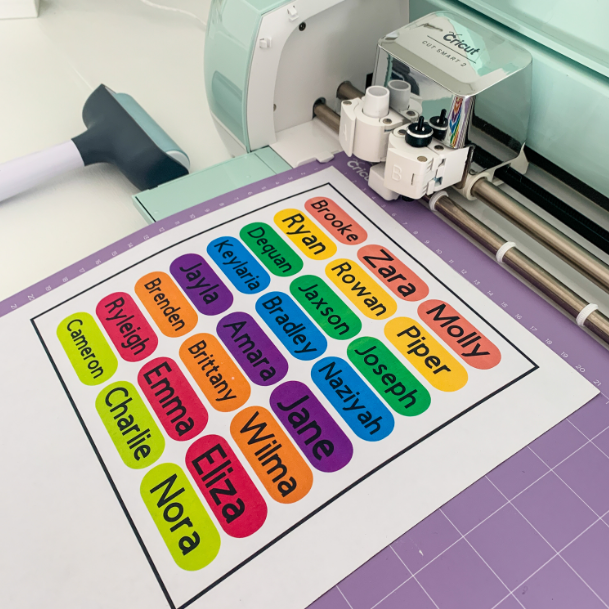
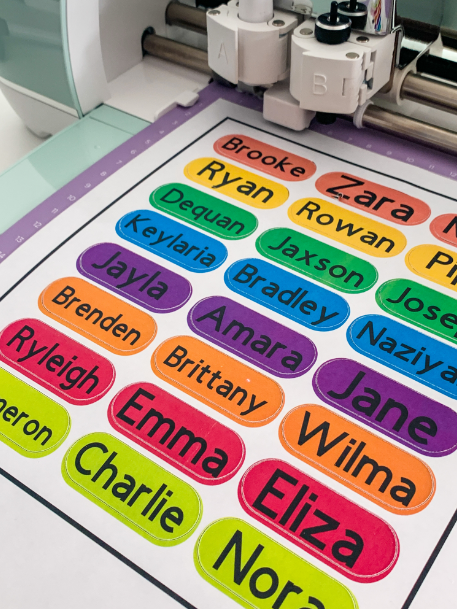
Woohoo! Now is the easy part! All you need to do is place your magnetic sheet onto the StrongGrip Machine Mat , load the mat, and let your Cricut do the rest!
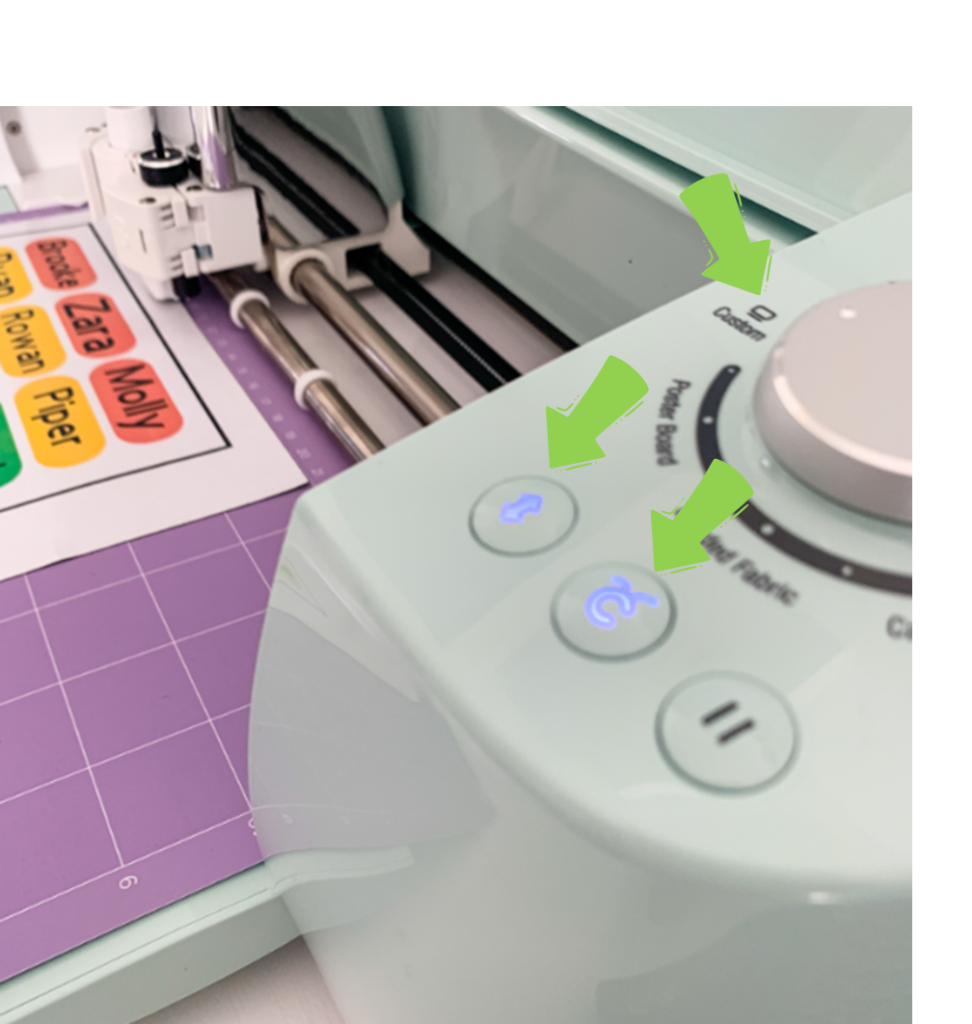
Set your dial to CUSTOM, then click the double sided white arrow (shown below) to load your mat into the machine. Once the mat is loaded correctly the C button will begin blinking. Press the blinking C button to start the cutting process.
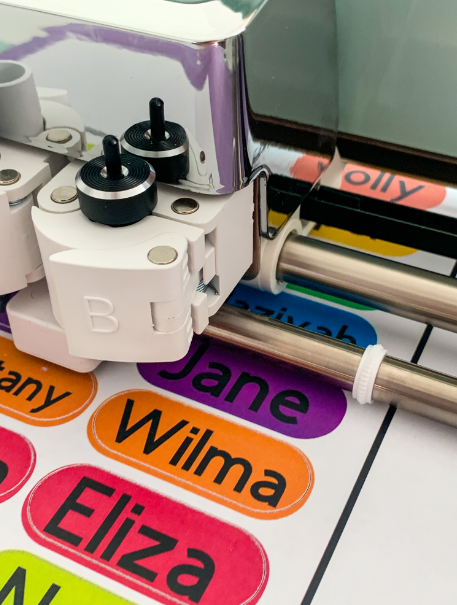
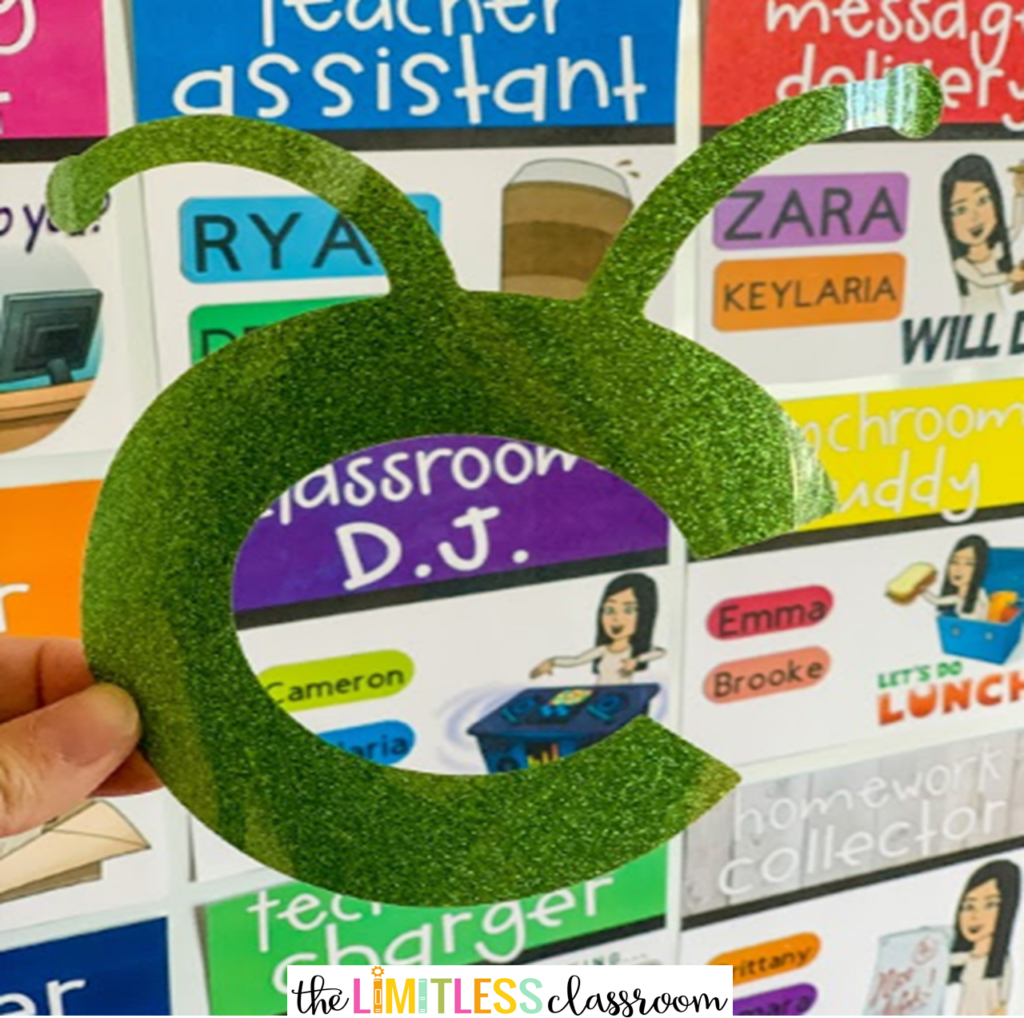
From here just sit back and let your Cricut Explore Air™ 2 machine do all the work! Your machine will cut out each and every name tag with excellent precision. How absolutely adorable, and talk about convenient!
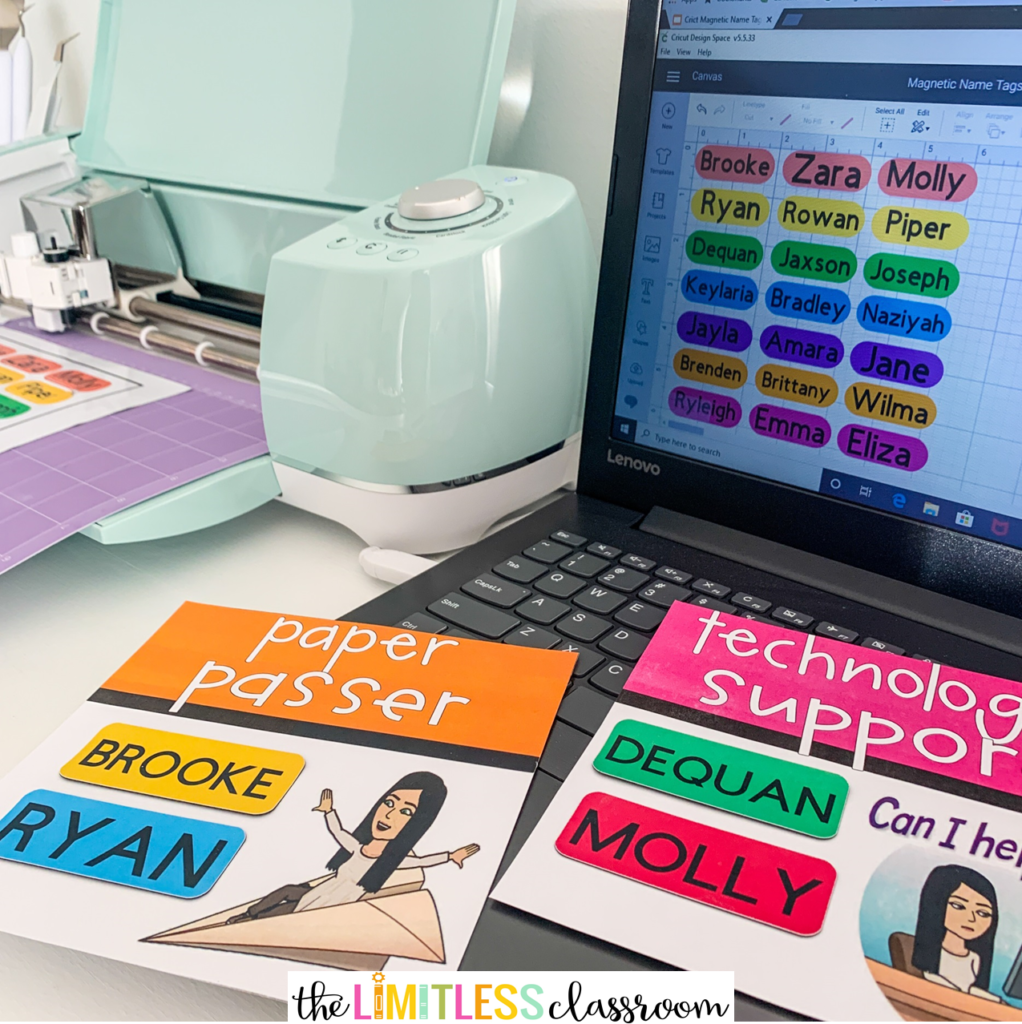
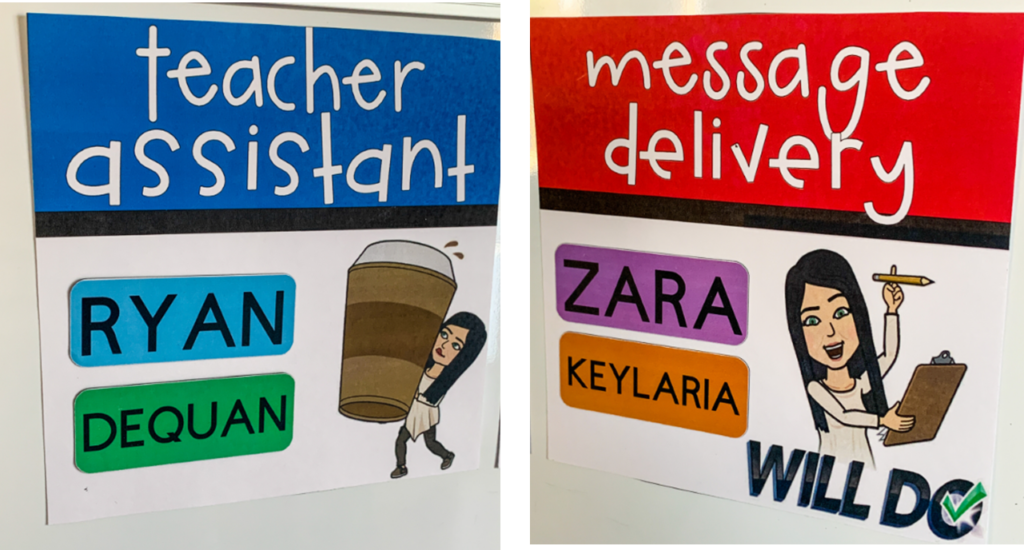
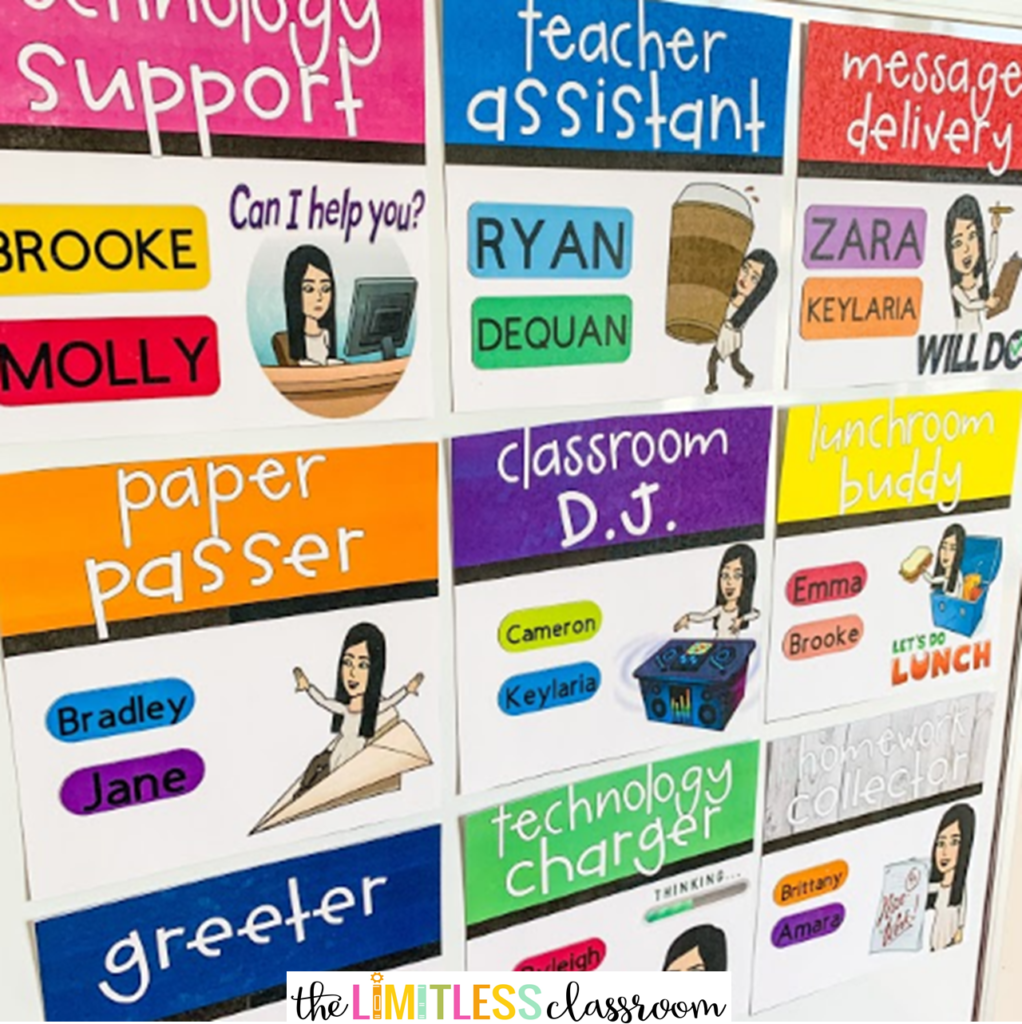
Here is a look at the final product! Now class jobs will be easier than ever to change each week!
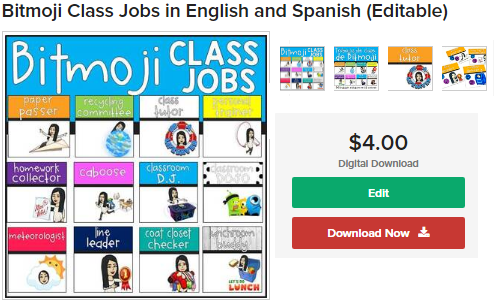
I hope this tutorial was helpful, and I look forward to showing you many more fun ideas for Cricut classroom projects! Below is where you can purchase the Bitmoji Class Job templates that were used for this project! Happy crafting friends!!!
